


Photo by Naman Kumar on Unsplash
In this article, we are going to create a minimal custom Switch Widget in Flutter. Flutter provides a built-in “Switch Widget” which looks simple. We are going to create our own “Flat Style” switch widget.
The switch has two parts:
The base
The knob
We will start writing code for the base and the knob separately.
Base
The base is nothing but the background of the switch which is in a rounded rectangle shape.
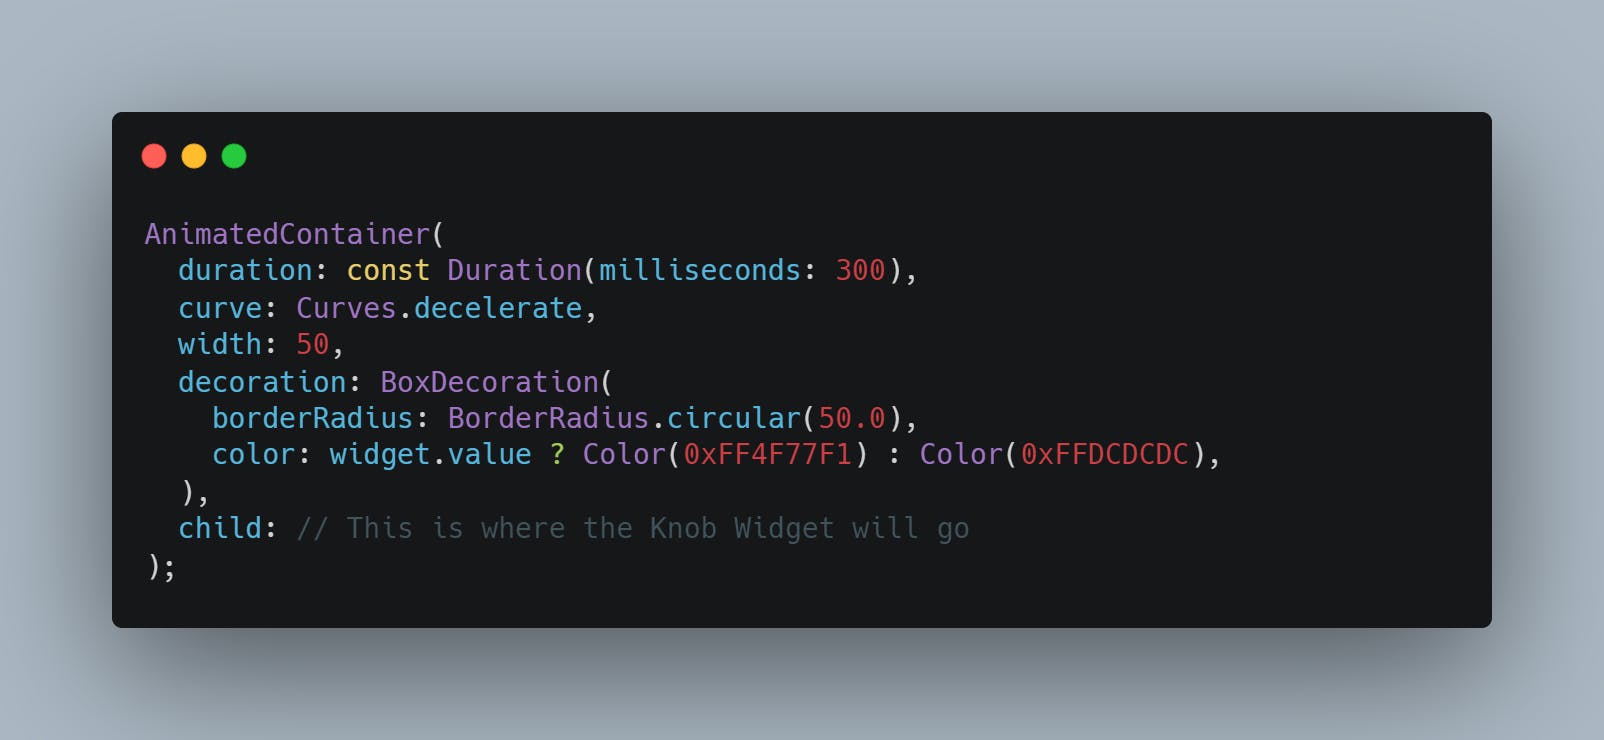 Widget for Switch Base
AnimatedContainer is used instead of container because we are going to add animations when the switch is turned ON and OFF.
widget.value holds either true or false which represents whether a switch is ON or OFF respectively
The Knob
The knob is the circular button inside the base that we use to toggle the state of the switch.
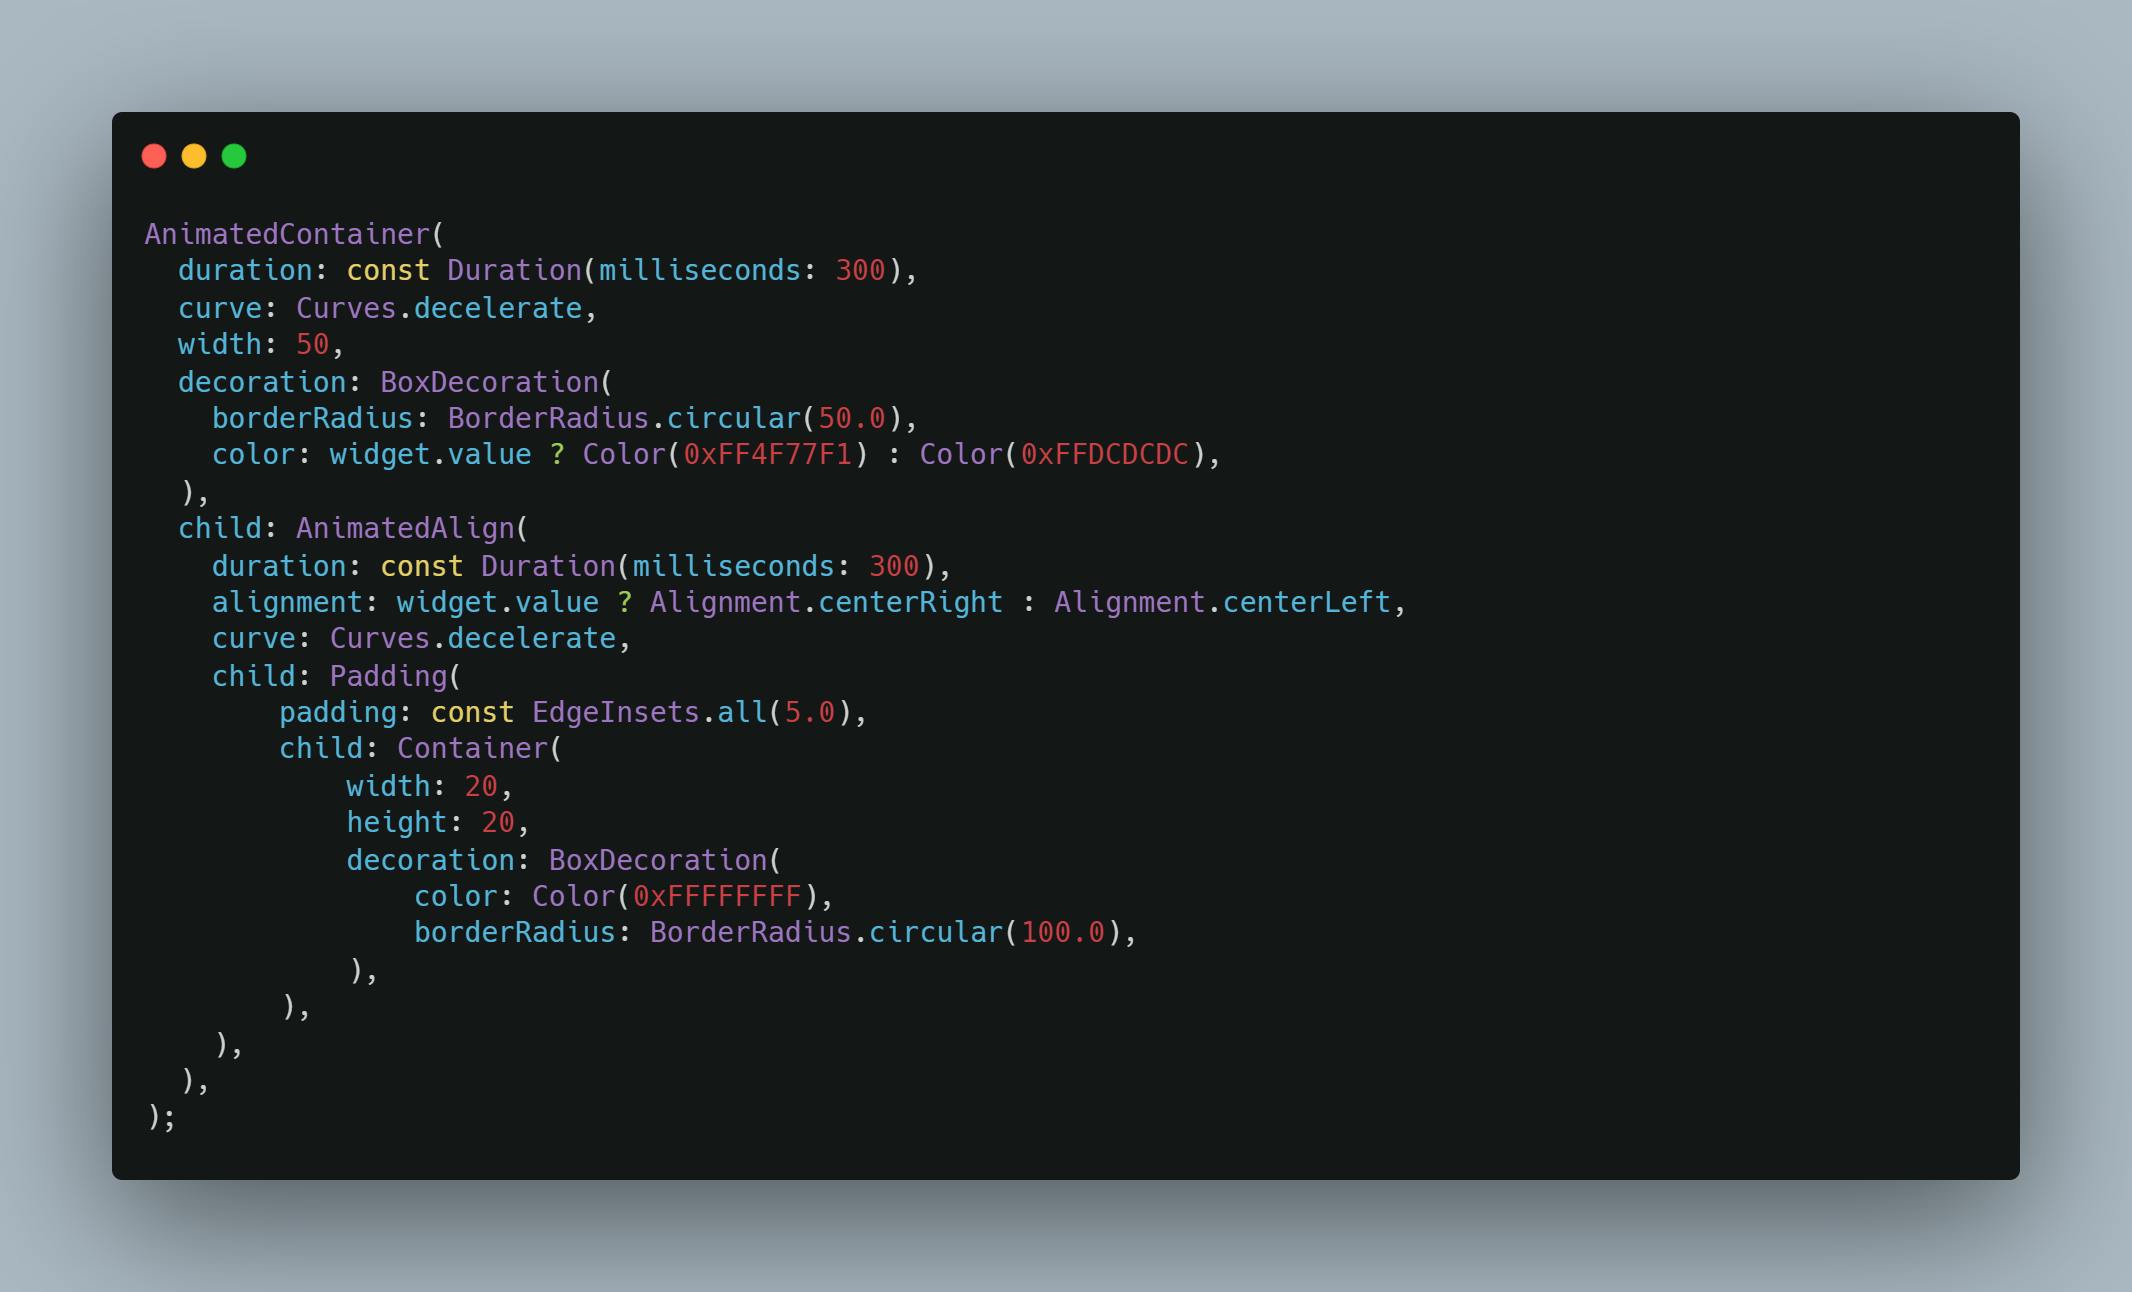 Widget for Switch Knob
- AnimatedAlign is used to animate the movement of the switch when the user clicks it.
The final output looks as follows:
 Final Output
Take a look at the below Gist to view the full code with functionality:
import 'package:flutter/cupertino.dart';
import 'package:flutter/material.dart';

class SwitchControl extends StatefulWidget {
  SwitchControl({
    this.value = false,
    @required this.onChanged,
  });

  bool value;
  final ValueChanged<bool> onChanged;

  @override
  _SwitchControlState createState() => _SwitchControlState();
}

class _SwitchControlState extends State<SwitchControl> {
  Alignment switchControlAlignment = Alignment.centerLeft;

  @override
  Widget build(BuildContext context) {
    return InkWell(
      splashColor: Colors.transparent,
      child: AnimatedContainer(
        duration: const Duration(milliseconds: 300),
        curve: Curves.decelerate,
        width: 50,
        decoration: BoxDecoration(
          borderRadius: BorderRadius.circular(50.0),
          color: widget.value ? Color(0xFF4F77F1) : Color(0xFFDCDCDC),
        ),
        child: AnimatedAlign(
          duration: const Duration(milliseconds: 300),
          alignment:
              widget.value ? Alignment.centerRight : Alignment.centerLeft,
          curve: Curves.decelerate,
          child: Padding(
            padding: const EdgeInsets.all(5.0),
            child: Container(
              width: 20,
              height: 20,
              decoration: BoxDecoration(
                color: Color(0xFFFFFFFF),
                borderRadius: BorderRadius.circular(100.0),
              ),
            ),
          ),
        ),
      ),
      onTap: () {
        setState(() {
          widget.value = !widget.value;
          widget.onChanged(widget.value);
        });
      },
    );
  }
}
Wrapping Up
Well, that’s everything! It’s a short and sweet tutorial but I hope you found it helpful.
Thank you 🤘
To know more about me, visit ganeshkumarm.me